Building the fish tank or pond

Aquaponics fish tank upside down
For the fish tank, I took a similar approach to building it than I did with the grow bed. I had my local home improvement store cut 3/4″ plywood to the exact size that I had previously sketched up. I added 2×2″ wooden bars to the bottom every 8 to 10 inches apart to reinforce the box. I calculated the total volume to be about 250 gallons. This is about the size of an IBC tank. Well they hold about 275 gallons.
Early on I knew that I wanted to excavate a hole to place the wooden box in. I didn’t want to have to deal with a plastic container in the hole. I was concerned that the walls may cave in due to the sand pushing on the outside.
Adding the pond liner
The real fun began when I started adding the pond liner. I picked up a standard pond liner based on the size box I had designed. I made sure that if you were to fold out all four sides and add the bottom, that the total size of the pond liner would cover the entire box with some overhang. I then unrolled and unfolded the pond liner and centered it above the box. After it was centered, I slowly pushed the liner down into the box making sure that I wouldn’t put too much strain on the liner to avoid tearing holes into it. Once I had reached the bottom of the box with the liner, I had all kinds of fun getting the wrinkles and creases removed. It was a bit frustrating at times. I added some water to the bottom, just a few inches. That helped with holding the pond liner in place and not lift up from the bottom corners and edges. I ended up with excess pond liner in all for corners in the box. I decided to fold the material over in the corner in order to deal with it. Then I used a stapler to tack the pond liner overhang form the outside against the wooden box. After I had all four sides secured, I added 2×2″ bars all around to form a protective edge.
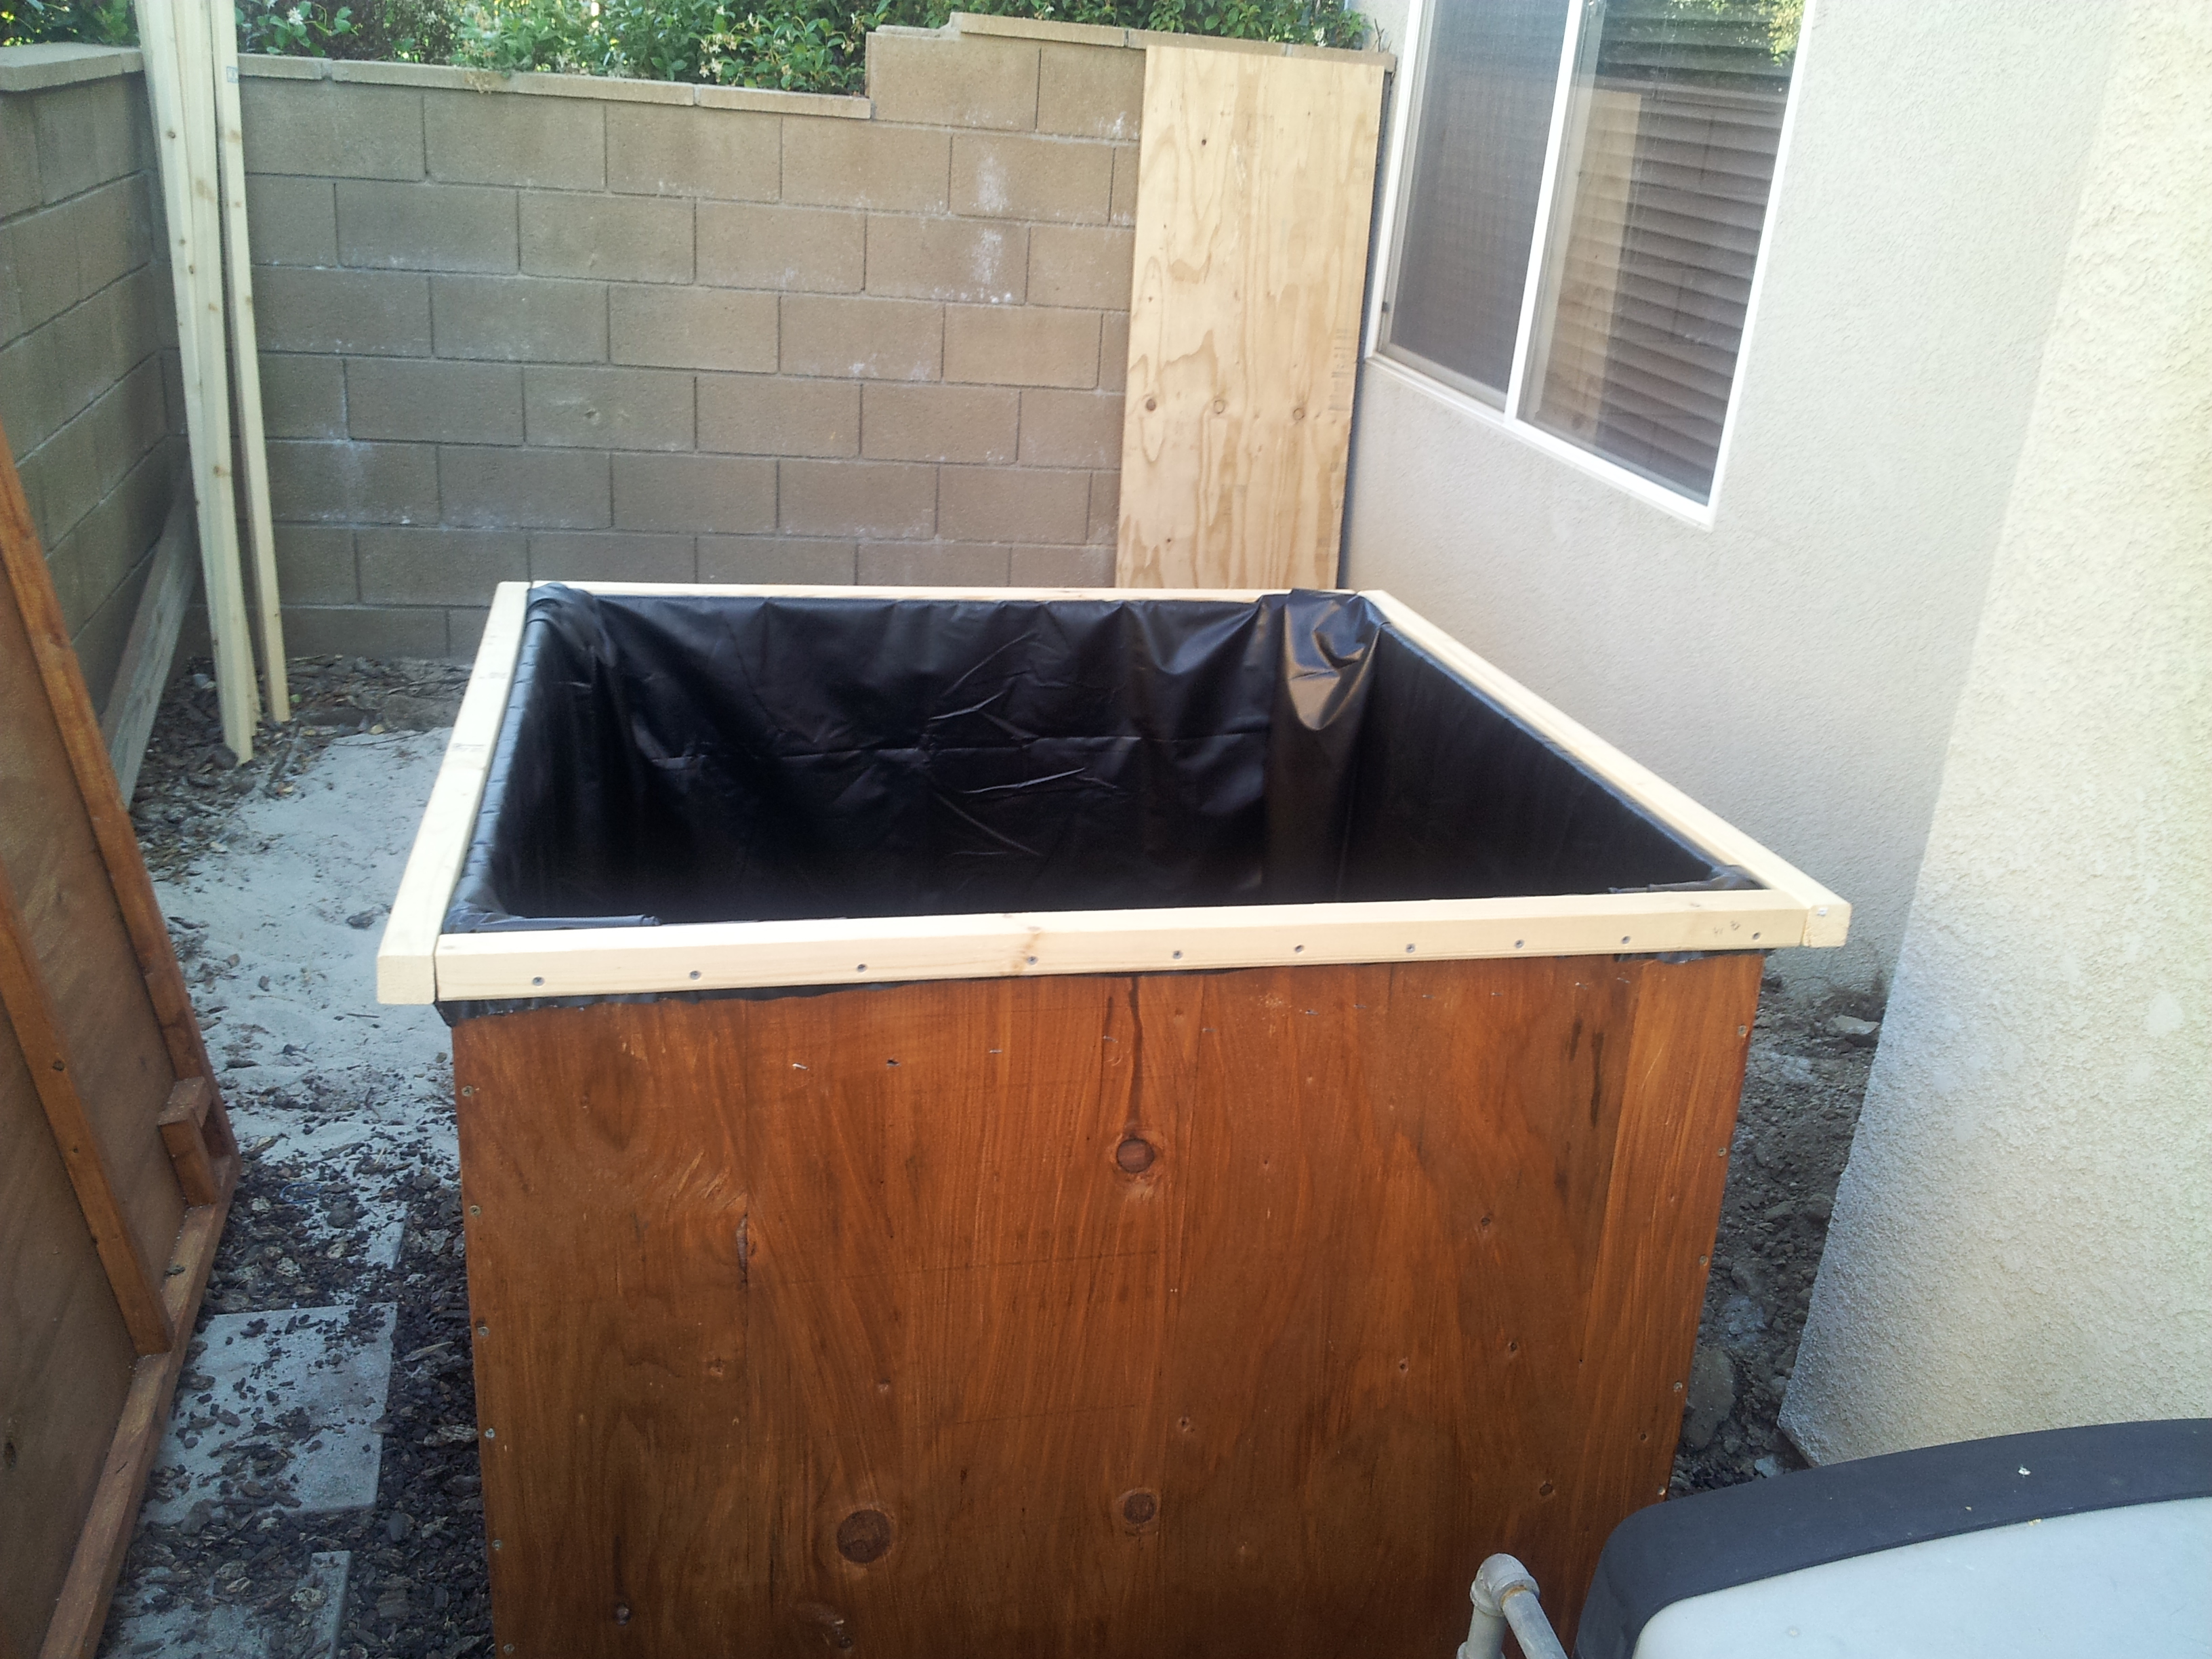
Aquaponics fish tank with pond liner
And here the finished fish tank and grow bed installed in its final place. It took a lot of effort to dig out the hole. We have compacted clay soil that is dried out. It is hard as a rock.

Aquaponics system installed.